

It’s been a little while since I posted about my new 1864 ball gown. Over a month, I think, because in February I posted about the plan/inspiration and then about the progress I made on the trim. I was steadily working on it during the month of March and had it ready to go for the Returning Heroes Ball a week ago. That’s not to say there wasn’t a little bit of last minute sewing the afternoon of the ball. My last minute sewing was gloves and hair piece, though, not dress, so that’s an accomplishment! And I wasn’t alone in my afternoon sewing… friends were sewing with me! There are lots of upcoming pictures but for now I’m going to post about the insides of the skirt and bodice. It’s a sneak peak, since you have to wait for the others pictures to see the full ensemble!

My other 1860s dresses have names: Belle is my dark blue gown and Annabelle is my white gown. I haven’t really been thinking of this dress by name until recently. Upon consideration, I’ve decided that she’s named Evelyn, or perhaps Evie for short. Why that name? I just like it, it’s old fashioned, and it has Y, and I have a fondness for the less commonly used letters of the alphabet. So here she is: Evie.
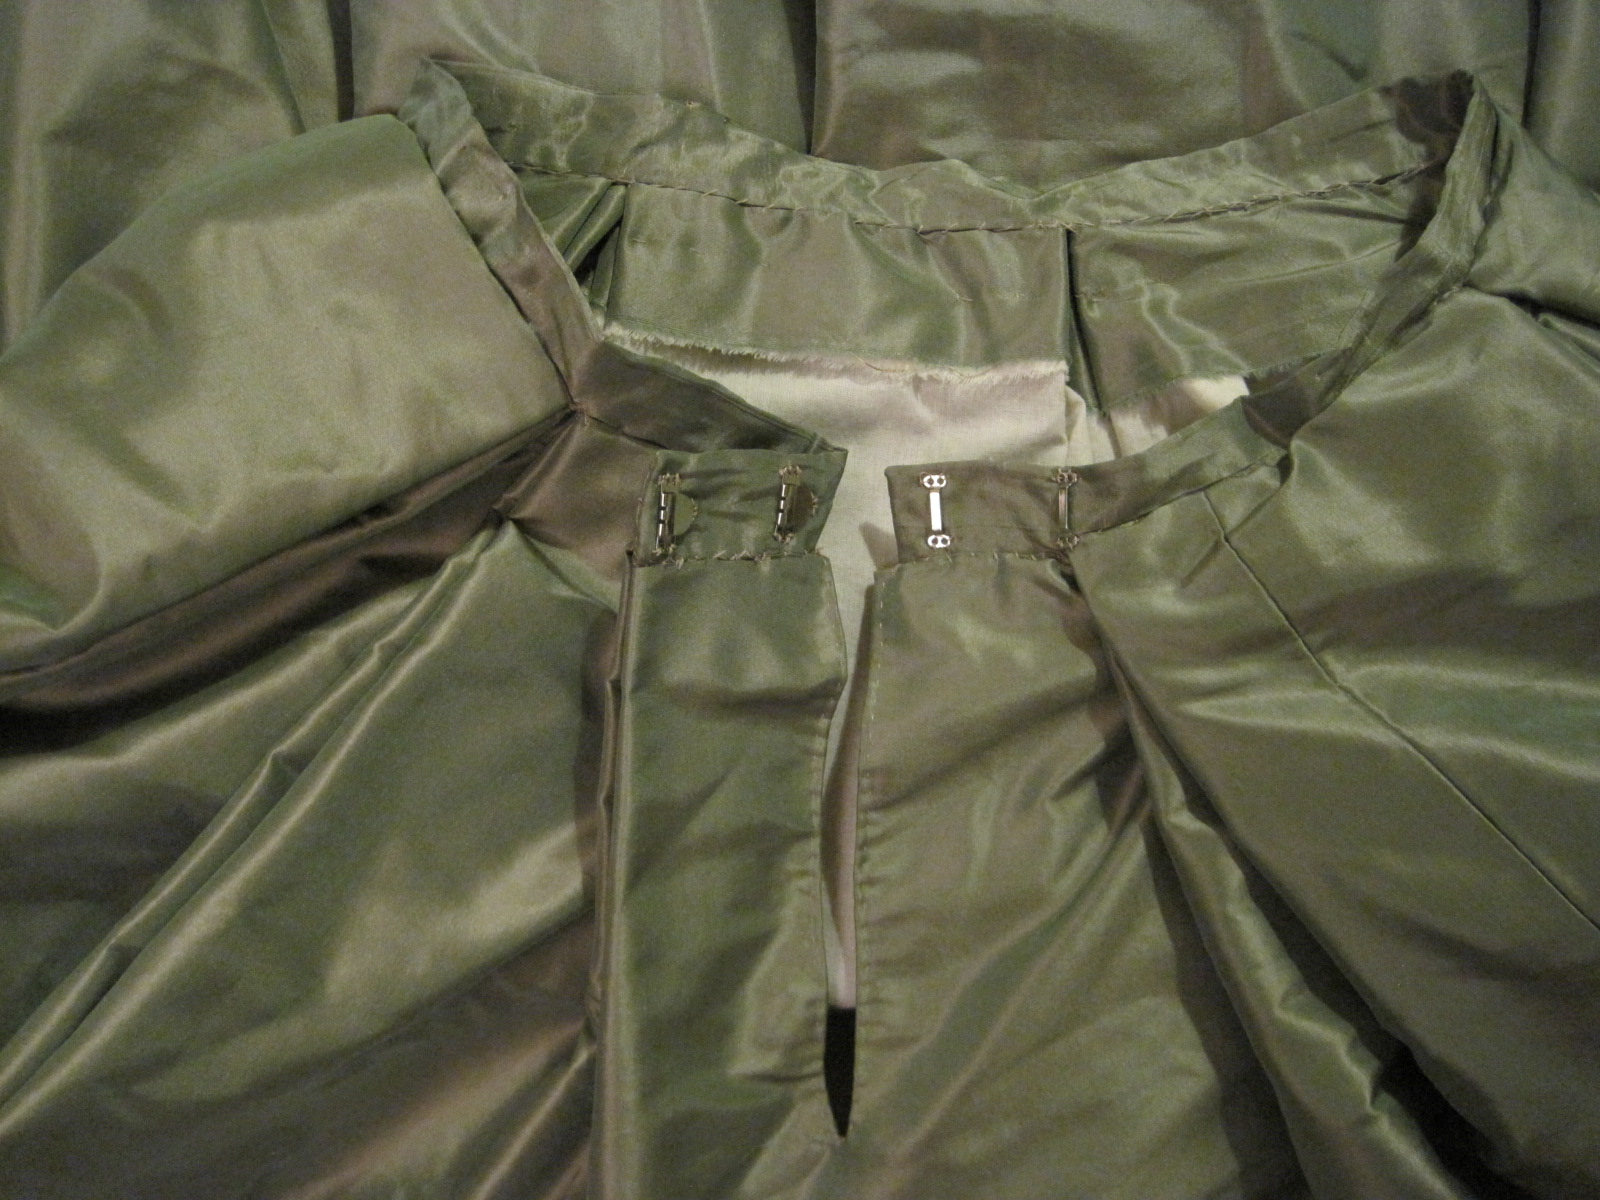

The raw top edges of the skirt are just turned to the inside and left alone. The silk skirt is flat lined with muslin, which helps give it some body, preventing creasing, and some stability at the hem for all that trim. There are six double box pleats evenly spaced around the skirt, as you can see. I haven’t tried this evenly distributed method on an 1860s skirt before (my previous dresses have knife pleated fronts and cartridge pleated backs, which makes them much heavier in the back than the front… I suppose I could divide the skirt in half and do that method, but given how those skirts are weighted, I’m sure there’s more fabric in back than in front). All that to say that I love how evenly weighted this skirt is! It means I don’t need a giant bum pad to keep my hoops level with the floor. (Come to think of it, I suppose I could remount the skirts of my other dresses onto new waistbands and redistribute the fabric… hm… I’ll have to think about that!)

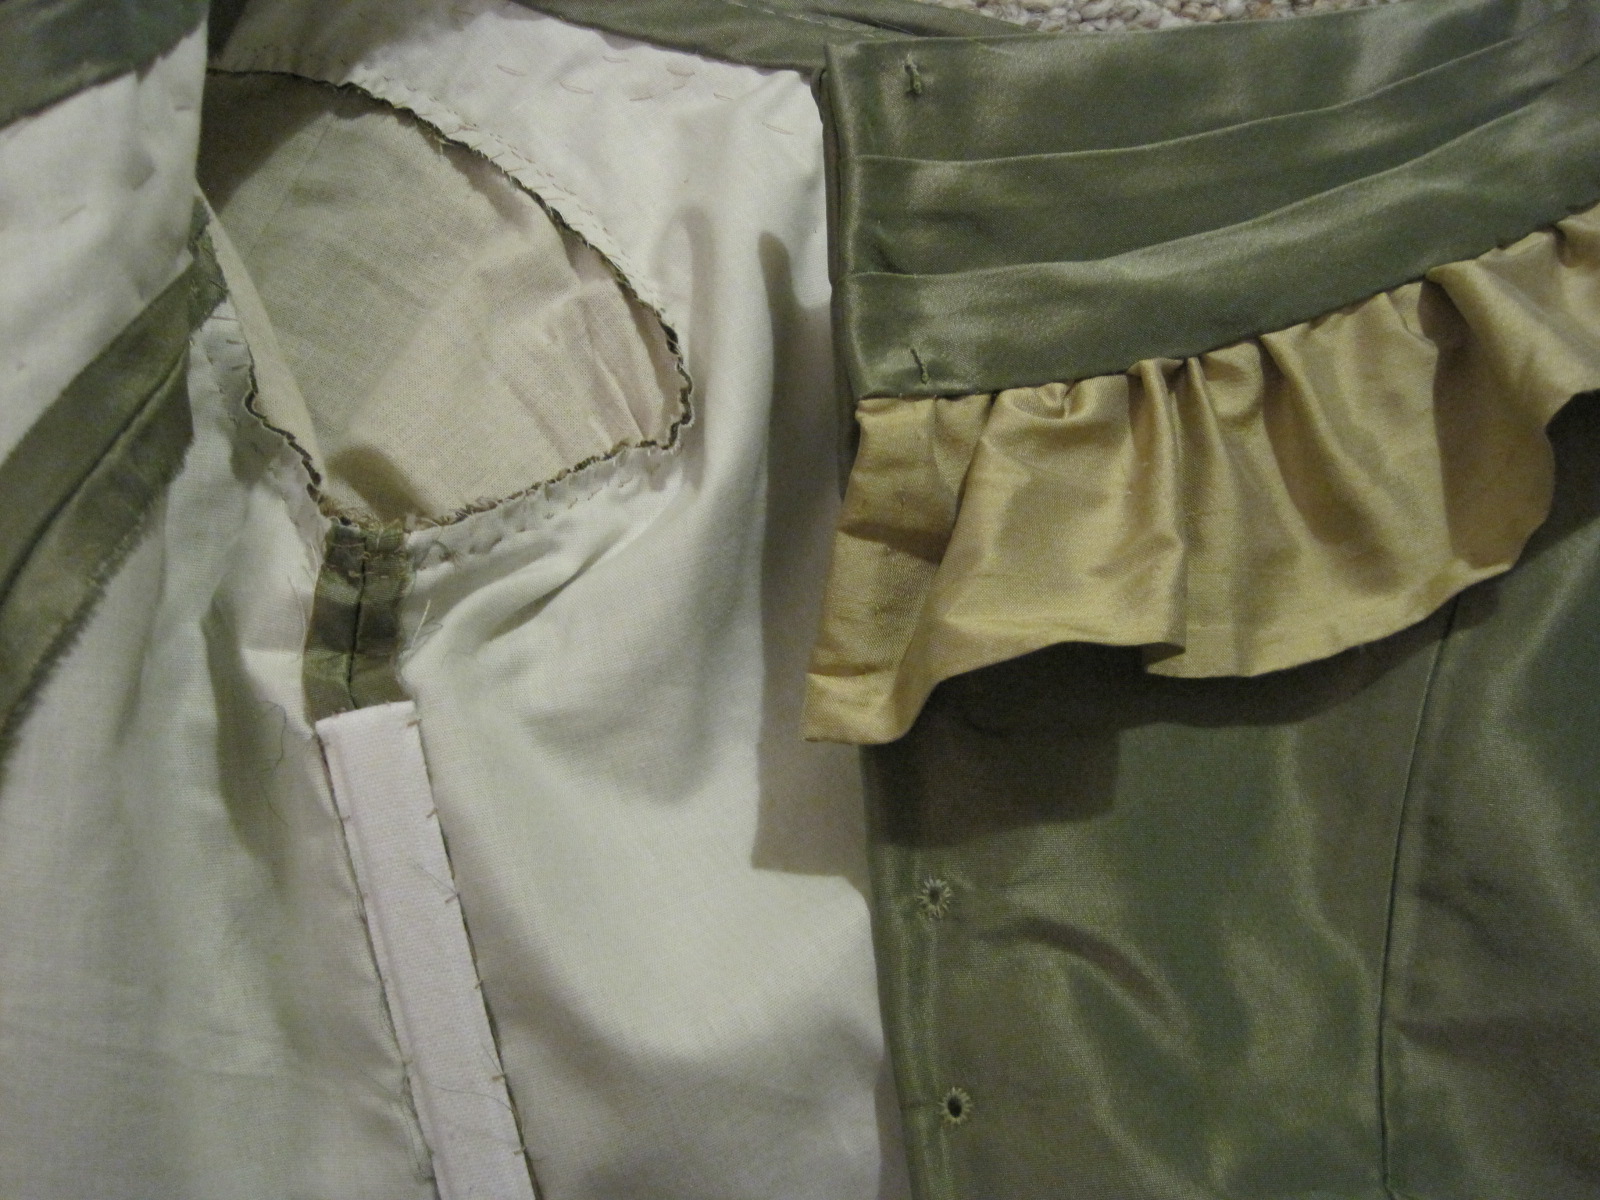
The sleeve is lined in muslin. I originally intended that it wouldn’t be seen, but then changed the sleeve design so now the muslin is visible on the inside of the bodice. It doesn’t matter, though, but I do like it when everything matches. The seam allowances of the bodice are just left unfinished (I might whip stitch over the edges some day, but that’s unlikely, since I’ll probably be sewing something else!). The armhole seam allowances are whip stitched together to keep them from fraying and to keep all those layers together. The armholes also have cording in them. The bodice closes at center back with lacing. The eyelets, like everything else, are hand sewn. The bertha also closes at center back (unusual, since a lot of them close on the shoulder, but I didn’t want my bertha pleating to be able to move or show the top of the ruffle). You can see the stitching holding the bertha in place in the first bodice picture, because those stitches go right through to the inside of the bodice.
I stopped keeping track of how many yards of hand sewing went into this dress… but now I’m curious again. So when I finished stitching the gathering stitches I was at 86 1/2 yds just for the trim. I’d estimate about another 22 yds of stitching to attach the trim and about 12 yds of stitching to construct the skirt before attaching it to the waistband. Waistband attachment was probably about 7 yds (it’s quite sturdy and all those pleats are well sewn!). That puts the skirt at a total of about 127 1/2 yds of hand sewing. Then there’s the bodice, which is maybe 12 yds of hand sewing total? That’s a harder one to estimate. That brings Evie to a total of approximately 140 yds of stitching.
I’m proud to say that every single stitch is hand sewn. Next time, though, I’m planning on machine stitching the inside seams. It’s super satisfying to have an entirely hand sewn dress, but it took about two months, and that could have been much sped up with the use of a sewing machine, which means I could have made more things! Who knows, I might change my mind, but right now even I am tired of hand sewing that dress.

Love seeing the innards of a project, beautiful work, thank you 🙂
Wow, that skirt trim is BEAUTIFUL!!! And the colour looks perfect on the dress…can’t wait to see photos of the finished dress, although I’m not all too familiar with the later 19th century (post 1840s) styles. It’s always a treat to see the left side of garments and the construction details – thank you!
Oh, Quinn, that trim is just gorgeous!! I absolutely love the combination of ruffles and cockades. Keep up the excellent work!
I just love those greens together. That totally works. The triple trim is coming out wonderfully. It looks so balanced in the layout.